How to Fill a Heavy Bag (the cost effective method)
Empty heavy bags are sold for a good reason; some fighters prefer to do the filling themselves to cut cost, or simply so that they can customize it perfectly. If you’ve decided to fill the bag yourself, doing it right is acutely important to having a good workout and not exposing yourself to unnecessary injury risks.
Shredded textile is one of the best options both environmentally and practically speaking. Here’s a step-by-step guide on how it’s done!
Step 1
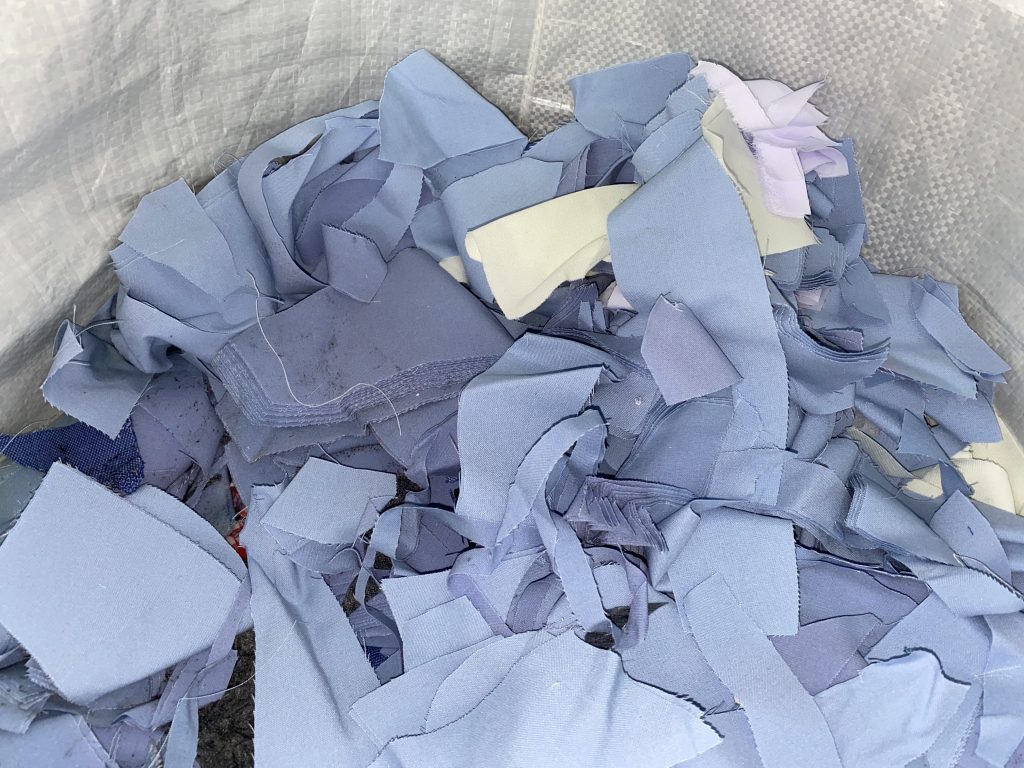
Collect a whole bunch of clean used clothing, the well-worn ones are the best because you want the softer pieces- it will be much easier to compact well and more efficient to shred into smaller sizes (more on that in step 2). The fewer gaps and air pockets there are, the more the clothing will settle well evenly and won’t require refilling as often. Avoid heavier fabric such as denim, bath towels, thick jacket materials, and so on.
Step 2
Have a good sharp pair of fabric scissors ready to shred up the collected fabric into small pieces (approximately 5-12cm). You want the pieces to lay relatively flat inside the bag so that it compacts well. The key to preparing the ideal filling; debone the fabric well and be certain to remove all zippers/ buttons/ hard collars/ hardware that may rub against the interior of your bag and cause premature damage over time.
Step 3
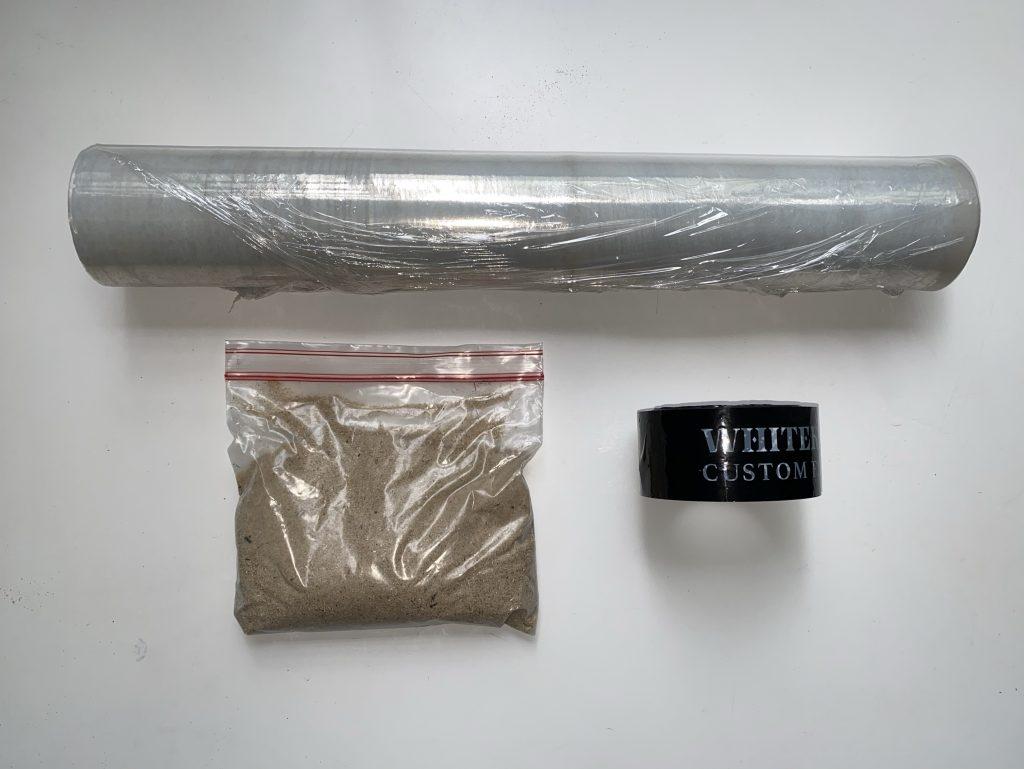
Prepare the sandbags. Get duct tape, fine sand (coarse sand will cause your bag to rip easily), and robust-quality ziplock bags (approximately 20 x17.5cm). Fill the ziplock bags with sand and cover the entire bag with duct tape securely especially around the seams. A good way to determine the number of sandbags needed is to allow 1 sandbag every foot apart, and at least 10kg towards the base of the bag. Adjust accordingly if you require a heavier bag.
Step 4
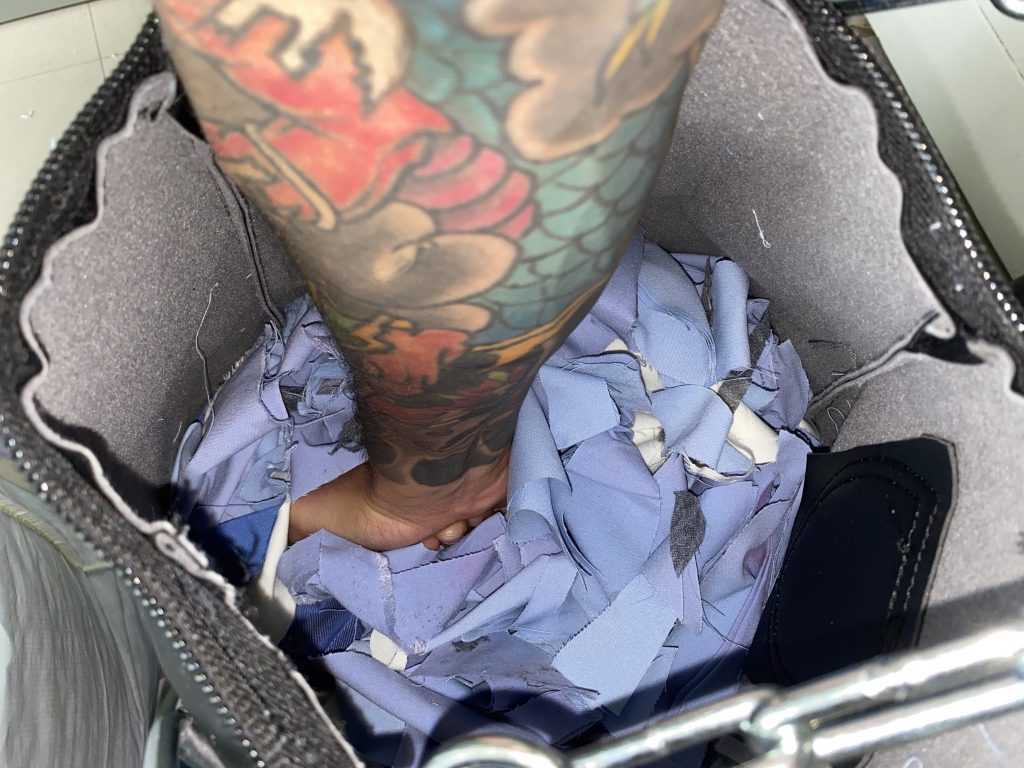
Filling your bag. Let the sandbags sit at the base and only in the center- it will lower the center of gravity to prevent excessive swinging during training. Surround the sandbags with the shredded scrap cloth pieces you’ve prepared earlier and be sure to pack it well and evenly so that the sides of your bag are well-stuffed with a uniform density. Use something long and tough like a baseball bat to help you with the stuffing. Ensure that the tool used for stuffing has no sharp ends that could cause an accidental puncture!
Step 5
Close your heavy bag carefully and tightly, hang the bag up securely on your bag mount and you’re good to go!
What’s the difference? – Heavy bag filling for Muay Thai VS Boxing
While heavy bags are used for Muay Thai, Boxing, and MMA, there is quite a distinct difference between the ones used for Muay Thai and Boxing.
Thai-style heavy bags tend to be stuffed with a higher ratio of sand to shredded cloth scraps compared to classic boxing heavy bags since these bags are traditionally designed for leg kicks, elbows, and knees.
Even though a classic heavy bag can be used for both punches and kicks, some heavy bags are designed to work better for punching exercises being that it is slightly wider and shorter in height to better imitate the form of a human torso. If you have limited space, you’ll probably want to go for something that works better as an all-rounder.
Heavy Bag Filling and Refilling Service?
We get that not everyone has the time (nor the interest!) to DIY, so if you’re looking for a hassle-free way to have your bag filled according to your personal requirements or need professional advice on that, check out our punching bag filling service that comes with a complimentary refill when the stuffing settles after a month of usage! Drop us a WhatsApp enquiry HERE or reach us via email. We hope that this article has been helpful!